If your question is not addressed below, please contact us through our support form and we'll get back to you shortly.
- How do I sign in to the IDrive® Mirror desktop application?
- How do I launch the IDrive® Mirror desktop application?
- How do I enable backup via Mirror desktop application?
- How do I backup my computers from the desktop interface?
- How do I schedule backup?
- How do I backup an individual disk partition of my computer?
- How do I perform a full system-image recovery?
- How to create a WinRE restore media for system-image restore?
- How do I restore specific disk volumes from the desktop interface?
- How do I restore individual files and folders?
- Is it possible to restore files while a backup is in progress?
- How do I perform a cleanup of the backed up data in my IDrive® Mirror account?
- Can I modify the performance settings of IDrive® Mirror?
If the desktop application is downloaded by logging in to your account via web, the application will be automatically linked to your account. In this case, there is no need to sign in and you can launch the application from the tray menu.
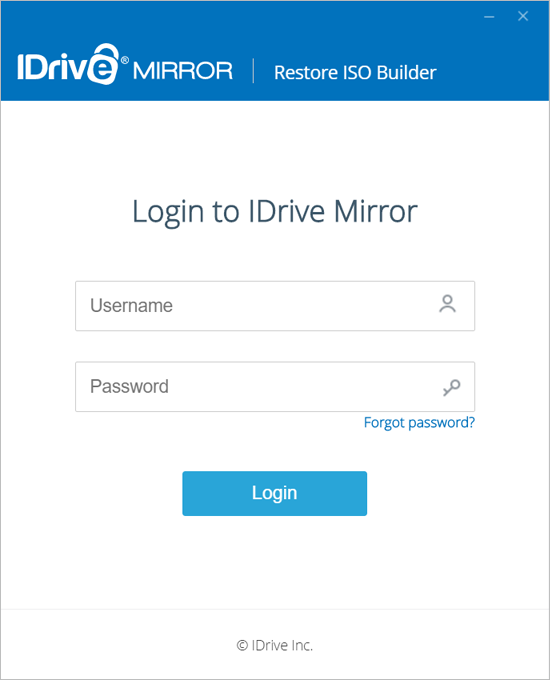
However, if the desktop application is downloaded from the IDrive® Mirror website, and no set up is previously installed, you must login with your Mirror account credentials on the desktop application.
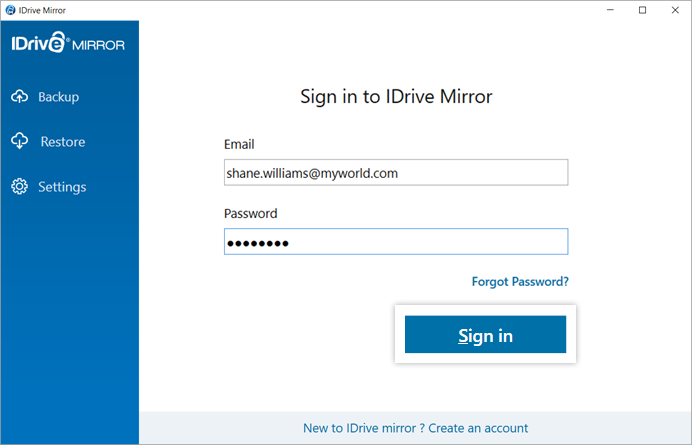
On logging out from the desktop application, any ongoing and scheduled backups will be stopped.
Once you install the desktop application, an IDrive® Mirror Tray icon will be created on your system tray.
To launch the application on your computer,
- Right-click the tray icon. It will let you access the tray menu.
- Click 'Launch IDrive® Mirror' from the tray menu.
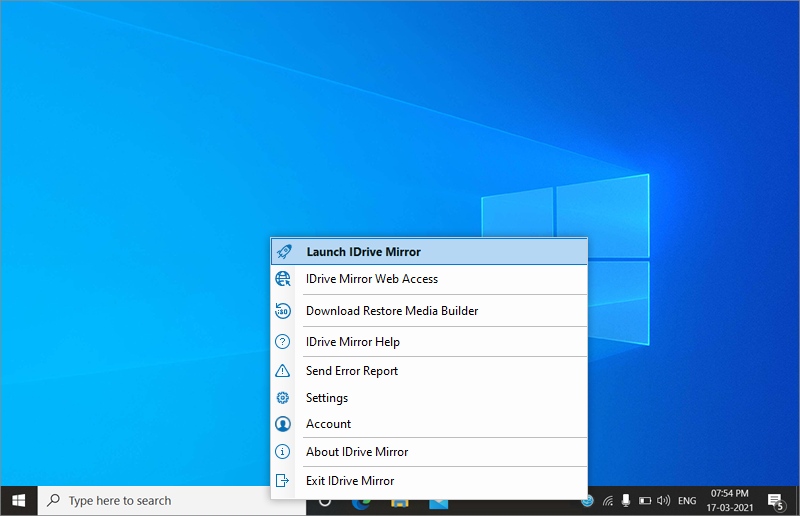
The IDrive® Mirror desktop application will open on your system.
To enable backup via the desktop application,
- Launch IDrive® Mirror from the desktop tray.
- Click 'Enable Now' in the ‘Backup' tab on the desktop application interface.
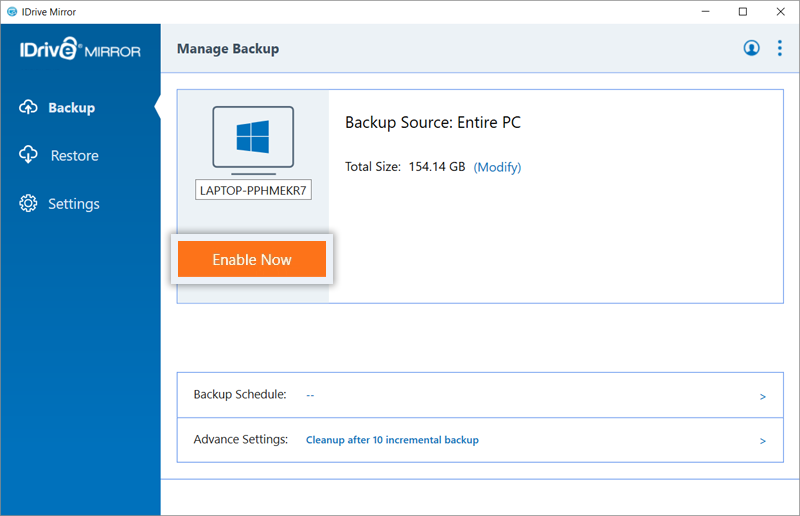
Your 'Entire PC' will be selected as the backup source by default.
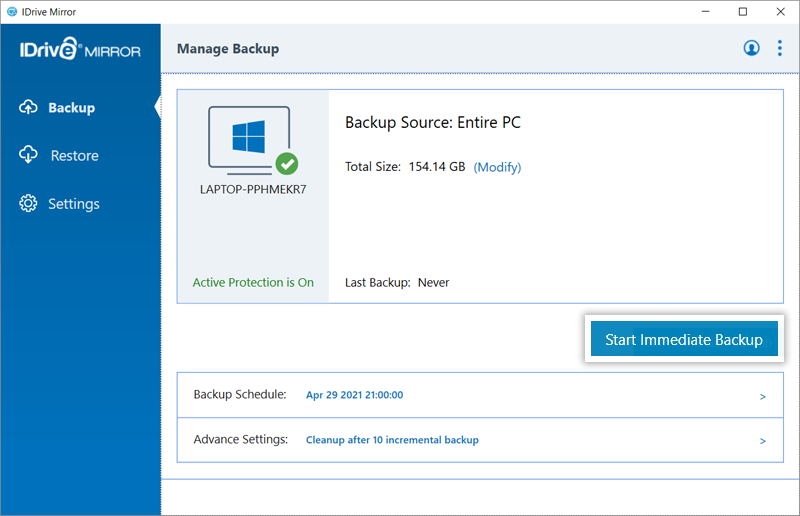
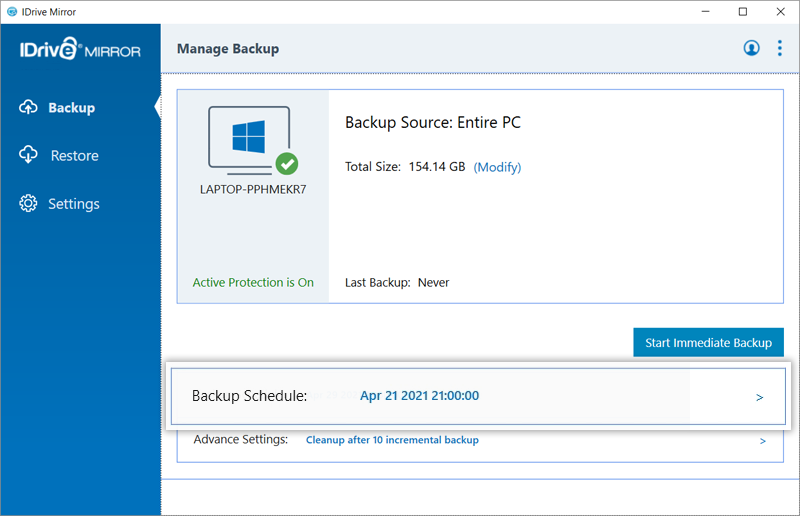
To start an immediate full disk-image backup of your computer,
- Launch IDrive® Mirror from the desktop tray.
- Click 'Start Immediate Backup' in the 'Backup' tab.
You can also schedule backups from the 'Backup Schedule' tab. Choose to perform backups on a daily basis or select the desired days for backup in a week. You can even set an interval between consecutive backups and fix the backup start time.
To schedule backup for your computer,
- Launch IDrive® Mirror from the desktop tray.
- Click 'Backup Schedule' in the 'Backup' tab.
- In the 'Backup Schedule' window, modify the following options as required:
- Backup Interval: Set the desired interval between consecutive backups from here.
- Daily: Select this radio button if you want to schedule daily backups and set the backup start time.
- Custom: Select this radio button to customize your backup on the required days and hours of the week.
- No Schedule: Click this radio button to disable all scheduled backup settings.
- Start time: Set the time range for your scheduled backup to start. The backup will start within the selected time range. For example, a backup scheduled to start between 7.00 AM - 8.00 AM may commence any time within this period.
Note: If the backup is set to start at a time that has already elapsed for the day, the backup will be scheduled for the next day. For example, if you set a backup schedule to start between 2.00 PM - 3.00 PM and if the scheduled time has elapsed for the day, the backup will commence on the next day.
- Cut-off Time: Set the time at which your scheduled backup should stop.
- Email notification: Receive email notifications on the status of the scheduled backup job. Enter the email address on which you want to receive the notifications.
- Notify on success: Receive notifications on successful completion of backups.
- Notify on failure: Receive notifications upon backup failures.
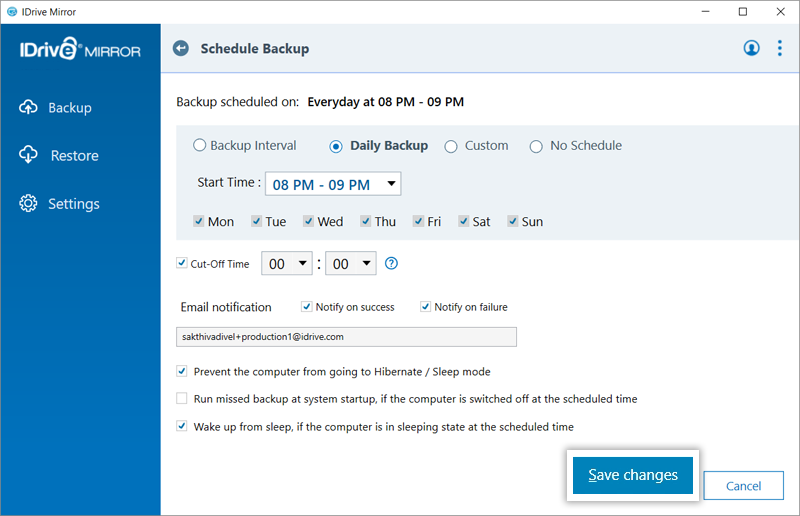
You can also set options to prevent your computer from going to hibernate/sleep mode and run missed backup on system startup if the computer was turned off during backup. You can even wake up your computer from hibernate/sleep mode at the scheduled backup time.
- Click 'Save Changes'.
Backups will occur as per the saved schedule.
IDrive® Mirror selects your entire computer for backup to the cloud by default. If required you can modify the backup source to backup specific drives of your PC.
To backup a disk partition,
- Launch IDrive® Mirror from the desktop tray.
- Click 'Modify'.
By default, all the drives are selected for backup. - Deselect the drives that you do not want to backup.
- Click 'Modify'.
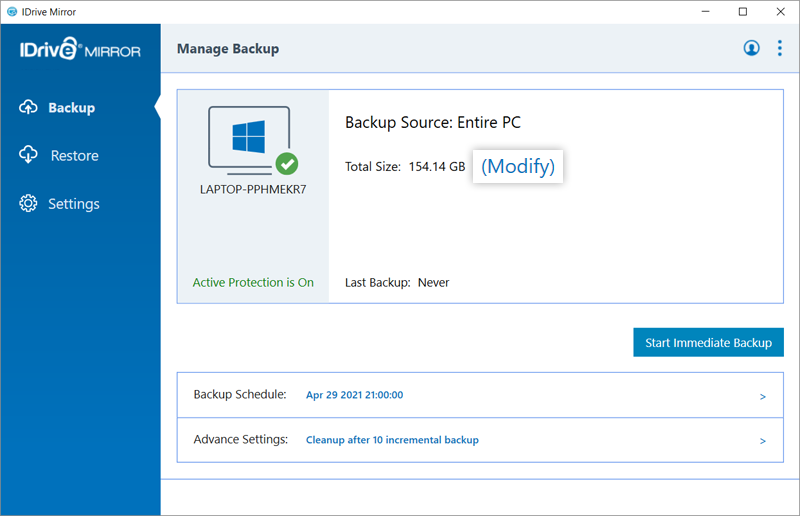
Note: If you deselect the drive where the operating system is installed, you will not be able to restore the entire computer.
In order to perform a WinRE-based complete system restore of your Windows computer and server system from the image backups stored in IDrive® Mirror account, follow these steps:
The following prerequisites must be fulfilled to restore data using a WinRE recovery media:
- The boot image architecture that is compatible with the destination computer architecture.
- A target hard drive with sufficient storage space for performing the restore operation.
- Minimum 1 GB RAM in the restore computer is needed to boot the ISO.
- A bootable IDrive® Mirror WinRE ISO file or a USB bootable flash drive. Know more >
To restore data using WinRE bootable USB drive,
- Connect the WinRE USB bootable flash drive to the computer.
- Launch the IDrive® Mirror WinRE Restore setup.
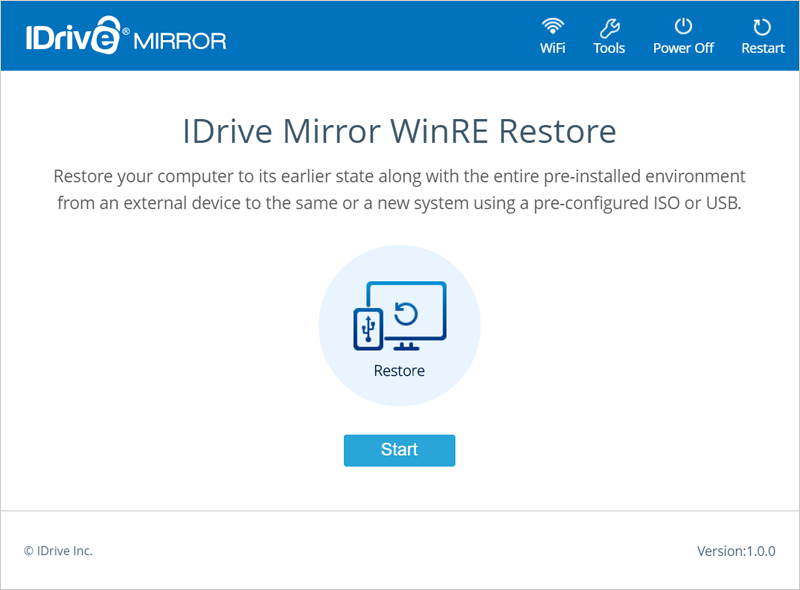
- Choose the computer, volume, and backup version that you want to restore.
- Click 'Next'.
- Select the target drive you want to restore the selected data and click 'Restore'.
Note: This operation will overwrite the existing data on the target drive.
The restore progress will be displayed and you will receive a message once the restore is complete.
To restore data using WinRE bootable ISO file, attach the ISO file to a virtual machine, and launch the IDrive® Mirror WinRE Restore setup. Then follow the remaining steps for USB data restore.
In order to initiate a WinRE-based system restore, you need a bootable USB or ISO. You can either download a generalized ISO for immediate use or create a USB or ISO for future use using the IDrive® Mirror Restore Media Builder app. You can use this bootable WinRE-based recovery media to boot up a Windows computer on which restore needs to be initiated.
To build a WinRE recovery media for future use,
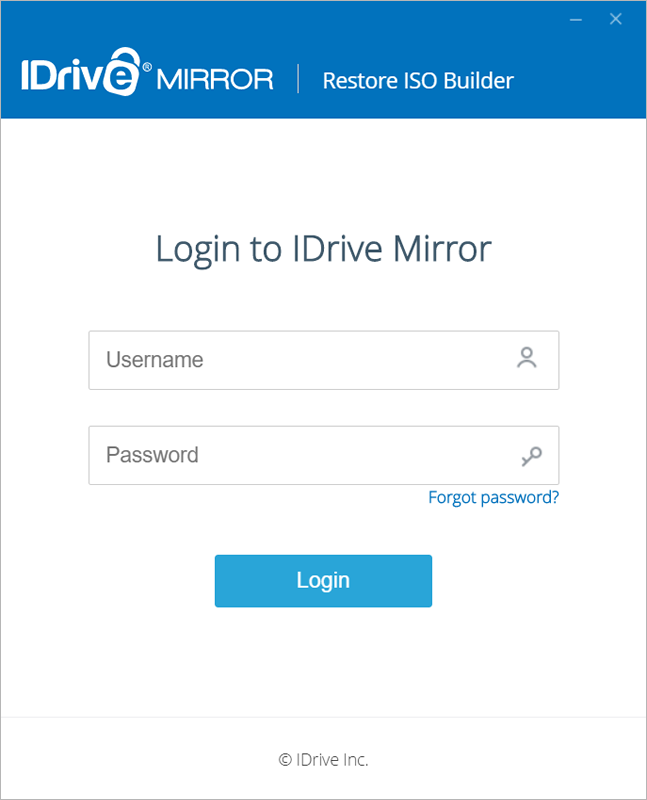
- Launch the IDrive® Mirror Restore Media Builder setup and login.
- Go to the 'Restore' tab.
- Click 'Download ISO Builder'. A popup window will appear.
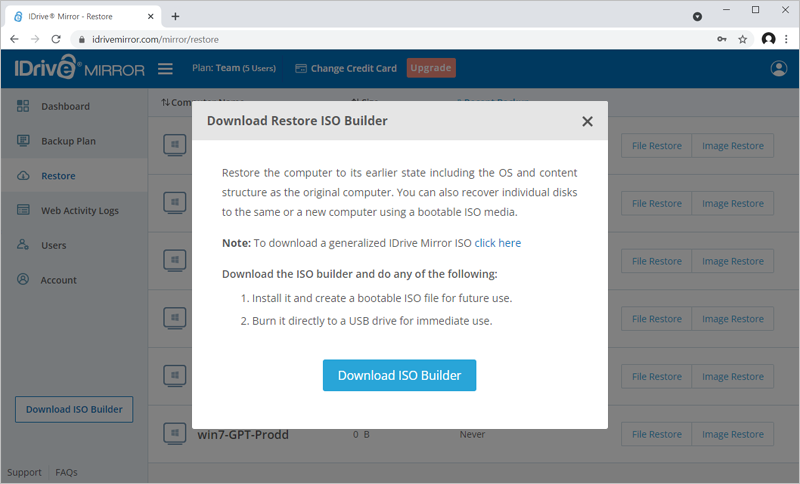
To download a ready-built bootable ISO file for immediate system restore, click 'Click here'. A generalized IDrive® Mirror ISO will be downloaded. You can upload the ISO file directly to a virtual machine and launch the IDrive® Mirror WinRE Restore setup.
Alternatively, to build a bootable USB or ISO for future use, click 'Download ISO Builder' on the popup window. Once downloaded, install the IDrive® Mirror Restore Media Builder app on your computer.
To build a WinRE recovery media for future use,
- Launch the IDrive Mirror Restore Media Builder setup and login.
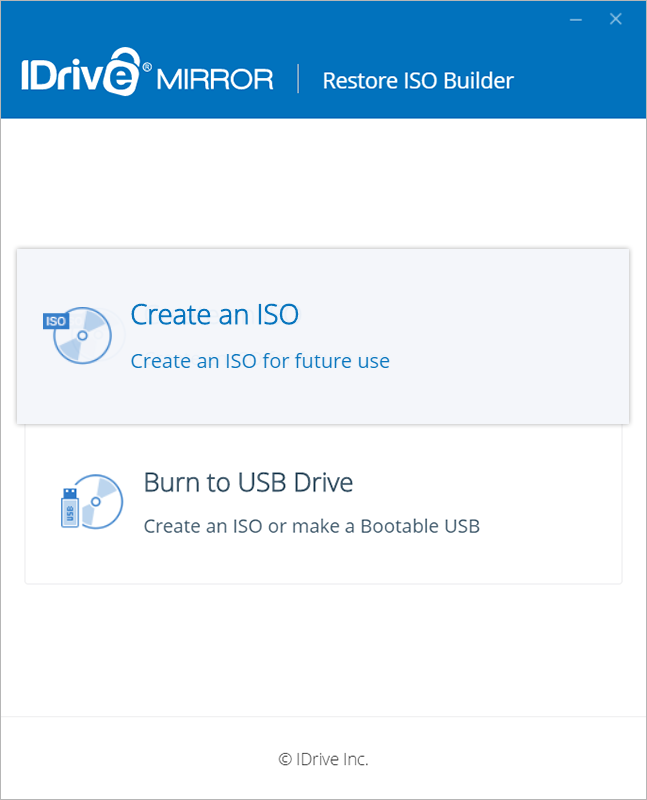
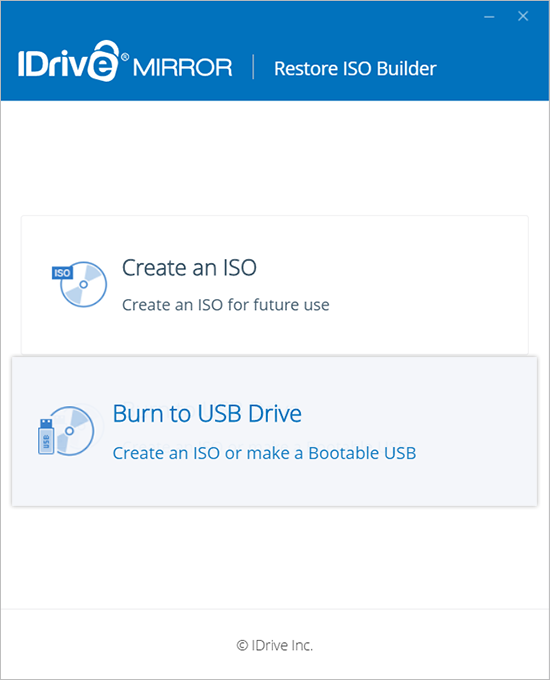
- Select 'Create an ISO'.
- Select the location where the ISO file needs to be saved from the ‘Browse’ button and click 'Create ISO file'.
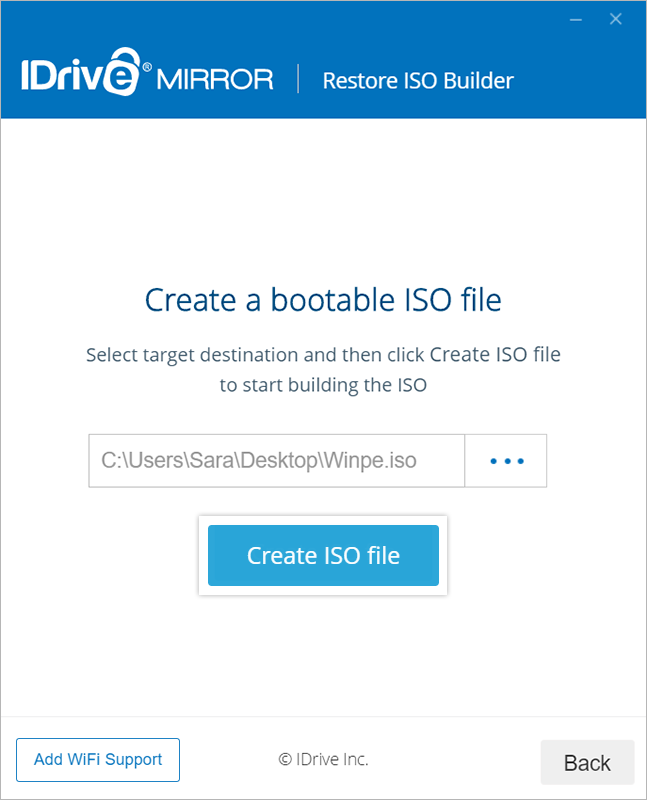
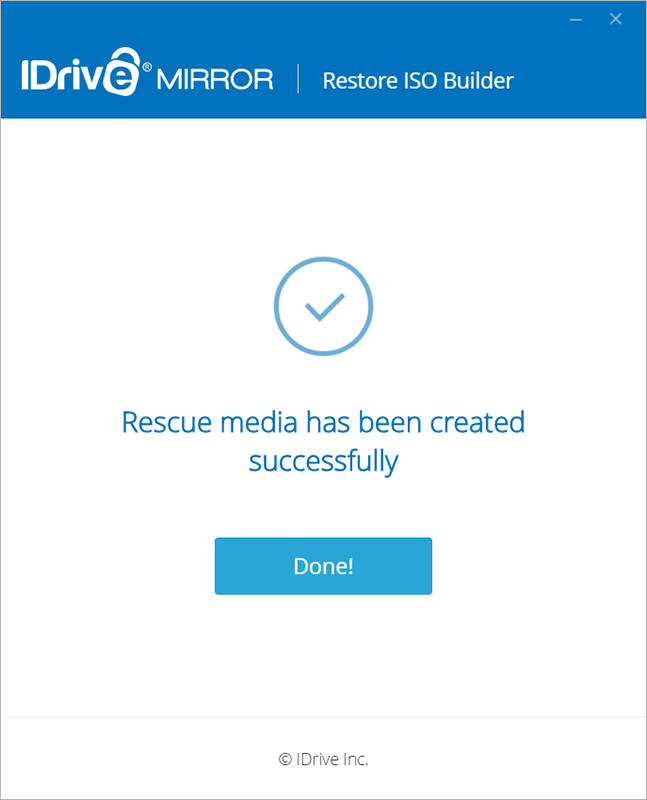
The ISO build progress will be displayed on the page.
You will receive a success message once the rescue media is created.
To build a WinRE recovery media for immediate use,
- Connect the USB flash drive to the computer.
- Launch the IDrive® Mirror Restore Media Builder setup and login.
- Select 'Burn to USB drive'.
- Select the required USB device as the target drive and choose the partition style from the respective drop-downs.
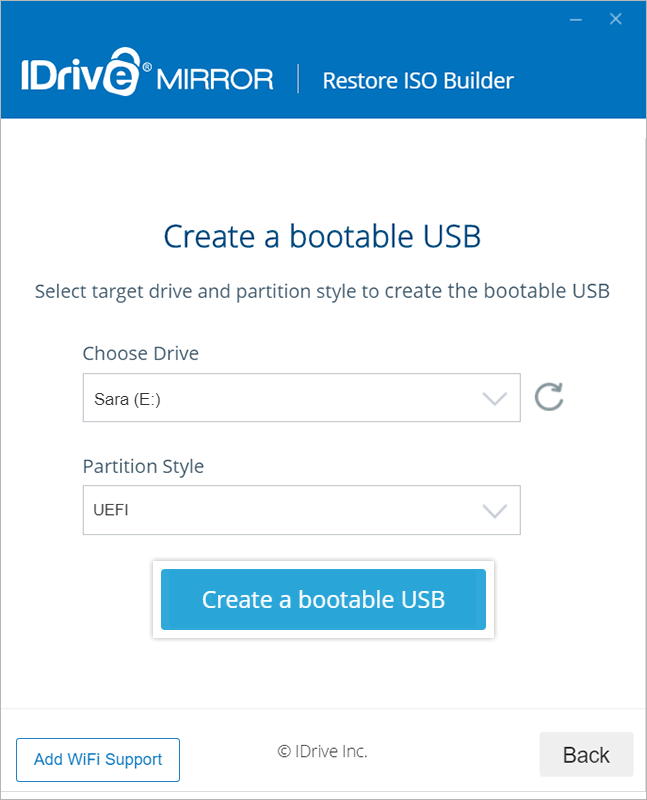
- Click 'Create a bootable USB' to create the boot device.
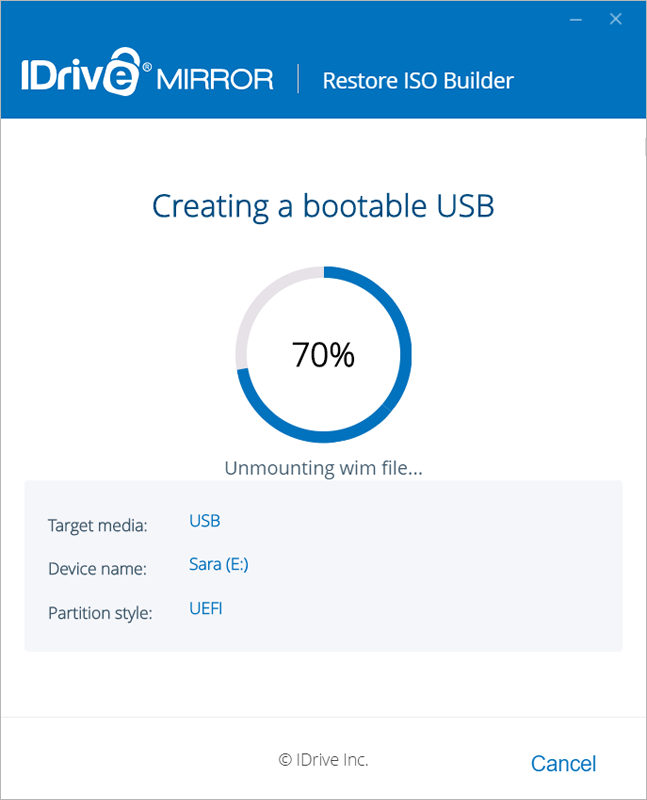
The bootable USB creation progress will be displayed on screen.
You will be notified once the bootable USB device is successfully created along with further instruction to use the bootable device.
Note: If the setup is not able to find the .wim file, you will be prompted to download Windows ADK to complete building the ISO.
- Launch the IDrive Mirror Restore Media Builder setup and login.
To restore specific disk volumes from your IDrive® Mirror account,
- Launch IDrive® Mirror from the desktop tray.
- Go to the 'Restore' tab and click 'Image Restore'.
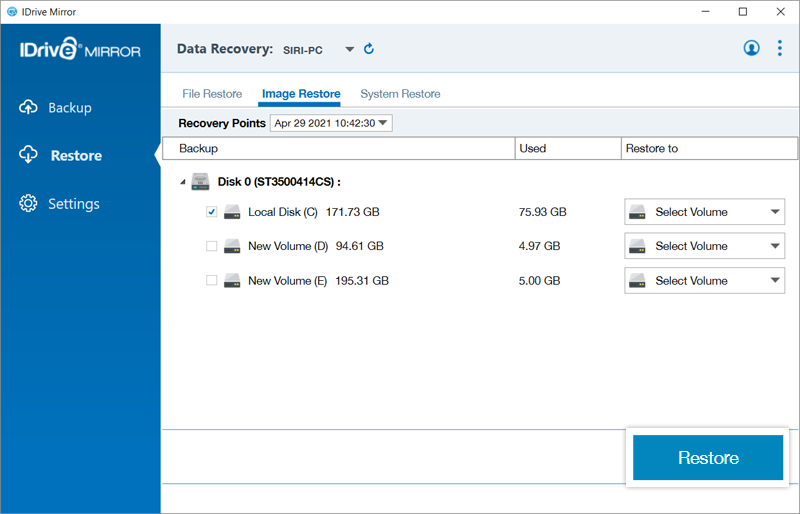
- Choose the required recovery point from the 'Recovery Points' drop-down list.
- Select the required disk volume from the list appearing on the screen.
- Click 'Restore'.
Note: Volume restore cannot be performed on the location, where the operating system is installed on the computer.
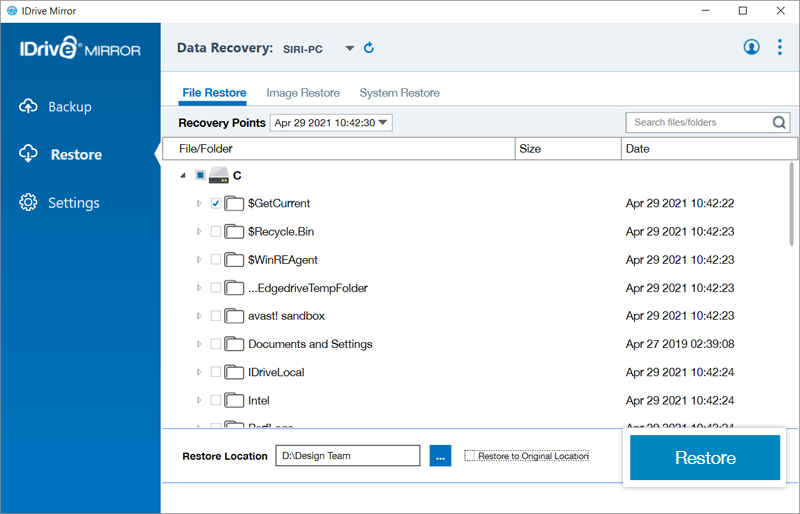
To restore an individual file or folder from your Mirror account,
- Launch IDrive® Mirror from the desktop tray.
- Go to the 'Restore' tab and click 'File Restore'.
- Choose the required recovery point from the 'Recovery Points' drop-down list.
- Select the volume containing the file or folder that you want to restore from the list appearing on the screen.
- Select the file or folder that you want to restore.
- Click 'Restore to original location' if you want to restore the file or folder to its original location on your system.
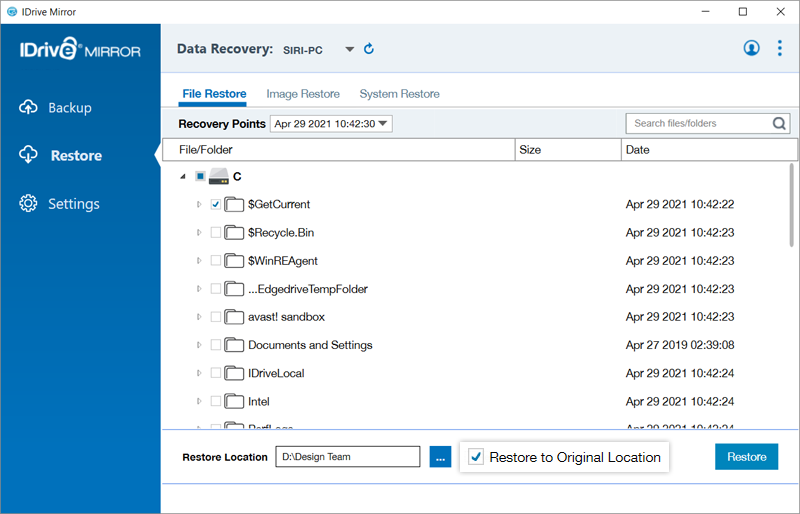
Note:
- To restore files to the original location the structure of the files/folders should be the same as your cloud backup.
- While restoring to the original location your existing files will be overwritten with their corresponding latest version available in the cloud.
- Mirror doesn't support 'Original Location Restore' for Operating System and application-related folders like 'Windows', 'Program Files' etc.
- Alternatively, choose any location on your computer by clicking
 to restore the selected files.
 - Click 'Restore'.
Yes, you can restore files while a backup is in progress. This currently applies only to file restore, allowing you to restore files to the original location or a custom location without interrupting the backup.
Similarly, you can choose to perform a file restore and and then initiate a backup simultaneously.
To monitor the backup and restore progress, go to the respective 'Backup' and 'Restore' tabs and click ‘View Details’ in the progress bar.The data stored in your IDrive® Mirror account is cleaned up periodically based on the Cleanup settings defined by you.
To set cleanup settings,
- Launch IDrive® Mirror from the desktop tray.
- In the 'Backup' window, click 'Advanced Settings'.
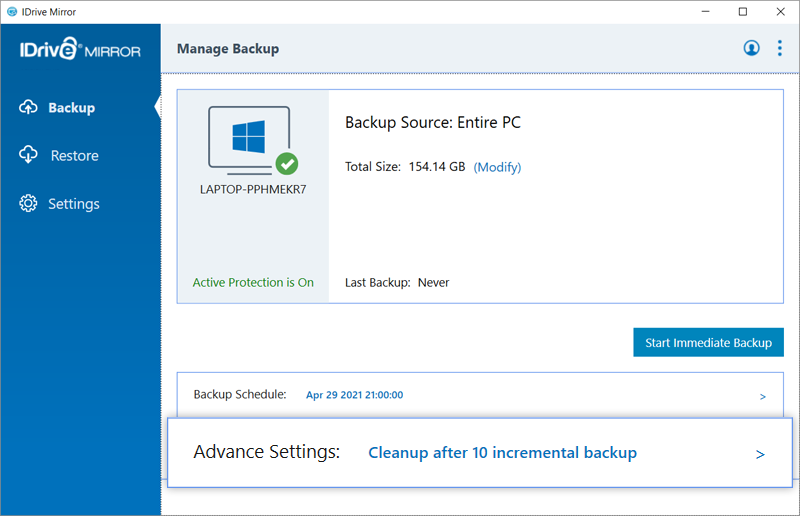
- Set the following options in the 'Cleanup' section:
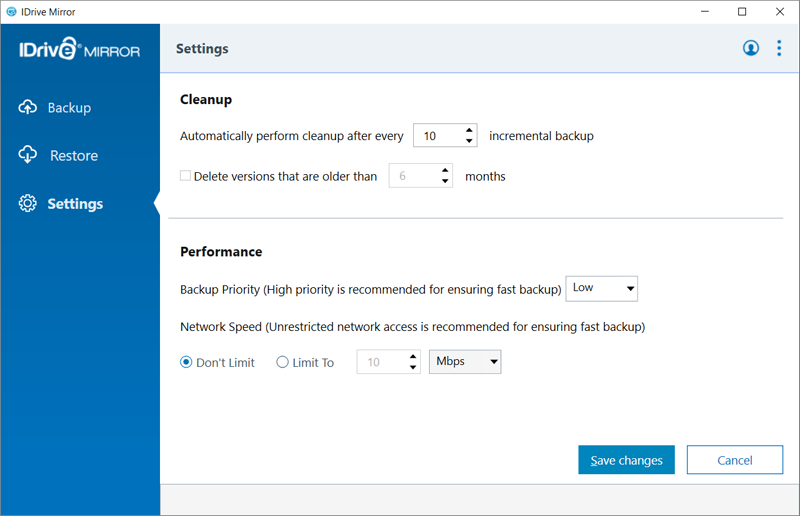
- Automatically perform cleanup after every '-' incremental backup
- Delete versions that are older than '-' months
- Click 'Save Changes'.
Yes, you can define performance parameters such as backup priority and network speed for your IDrive® Mirror account.
To edit the settings,
- Launch IDrive® Mirror from the desktop tray.
- In the 'Backup' window, click 'Advanced Settings'.
- Set the following options in the 'Performance' section:
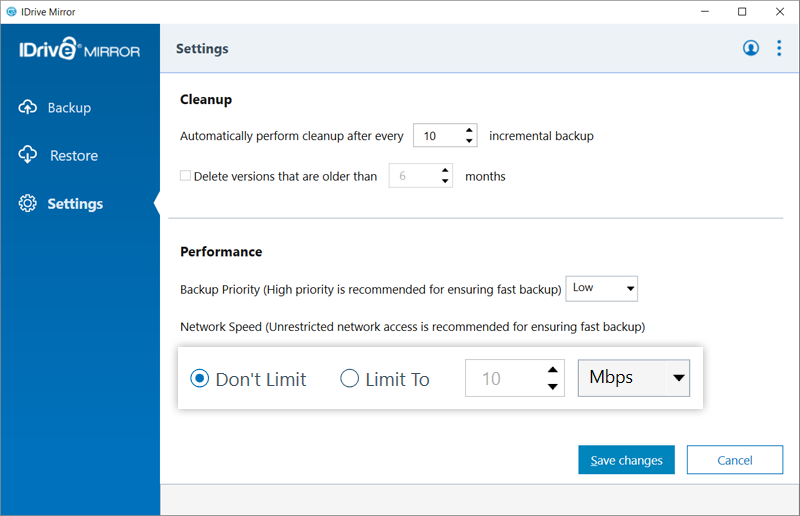
- Backup priority (High priority recommended for ensuring fast backup '-'.
- Network Speed (Unrestricted network access is recommended for ensuring fast backup)
a) Don't Limit
b) Limit To
- Click 'Save Changes'.